Agentset stores file uploads in either S3 or S3-compatible services like Cloudflare R2. We recommend using Cloudflare R2 for self-hosting Agentset, as it’s a more cost-effective solution compared to AWS S3. Here’s how you can set it up:
1

Create R2 bucket

You’ll need to subscribe to the R2 service if you haven’t already.
In your Cloudflare account, create a new R2 bucket. We recommend giving your bucket a descriptive name (e.g. agentset) and leaving the remaining settings as is.
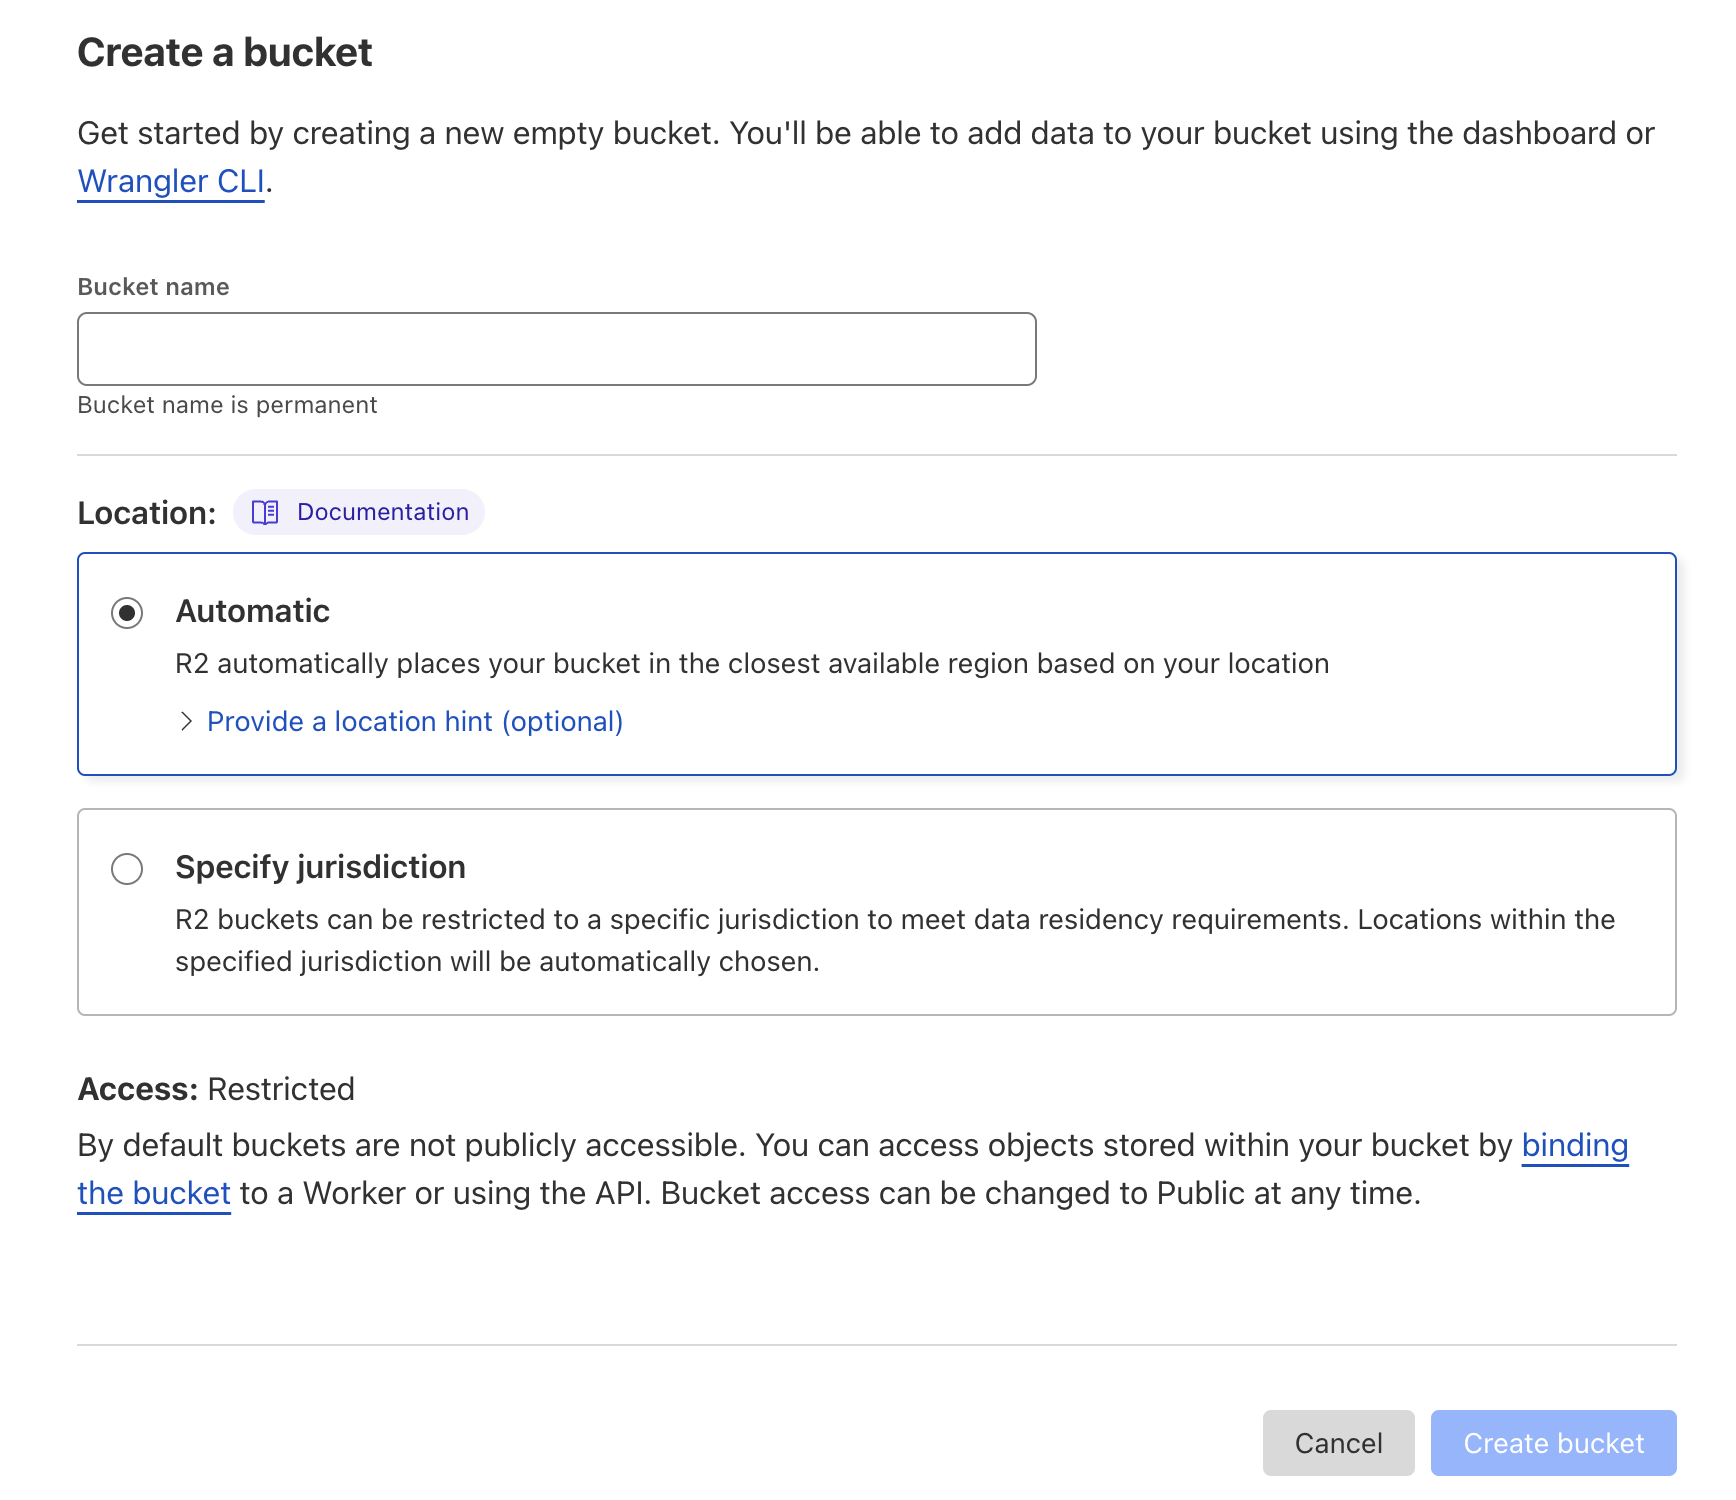
Cloudflare R2 bucket
In your bucket settings, copy the S3 API value – you’ll need it in Step 3.
2

Set up access to R2

From the R2 main page, click Manage R2 API Tokens on the right-hand column.
Cloudflare manage API tokens
Then, click Create API Token.
Cloudflare R2 API token
Make sure to name your API token something relevant to the service that will be using the token.Give it “Object Read & Write” permissions, and we recommend only applying ito to a single bucket.You can leave the remaining settings (TTL, Client IP Address Filtering) as is, and click Create API Token.After you create you token, copy the 
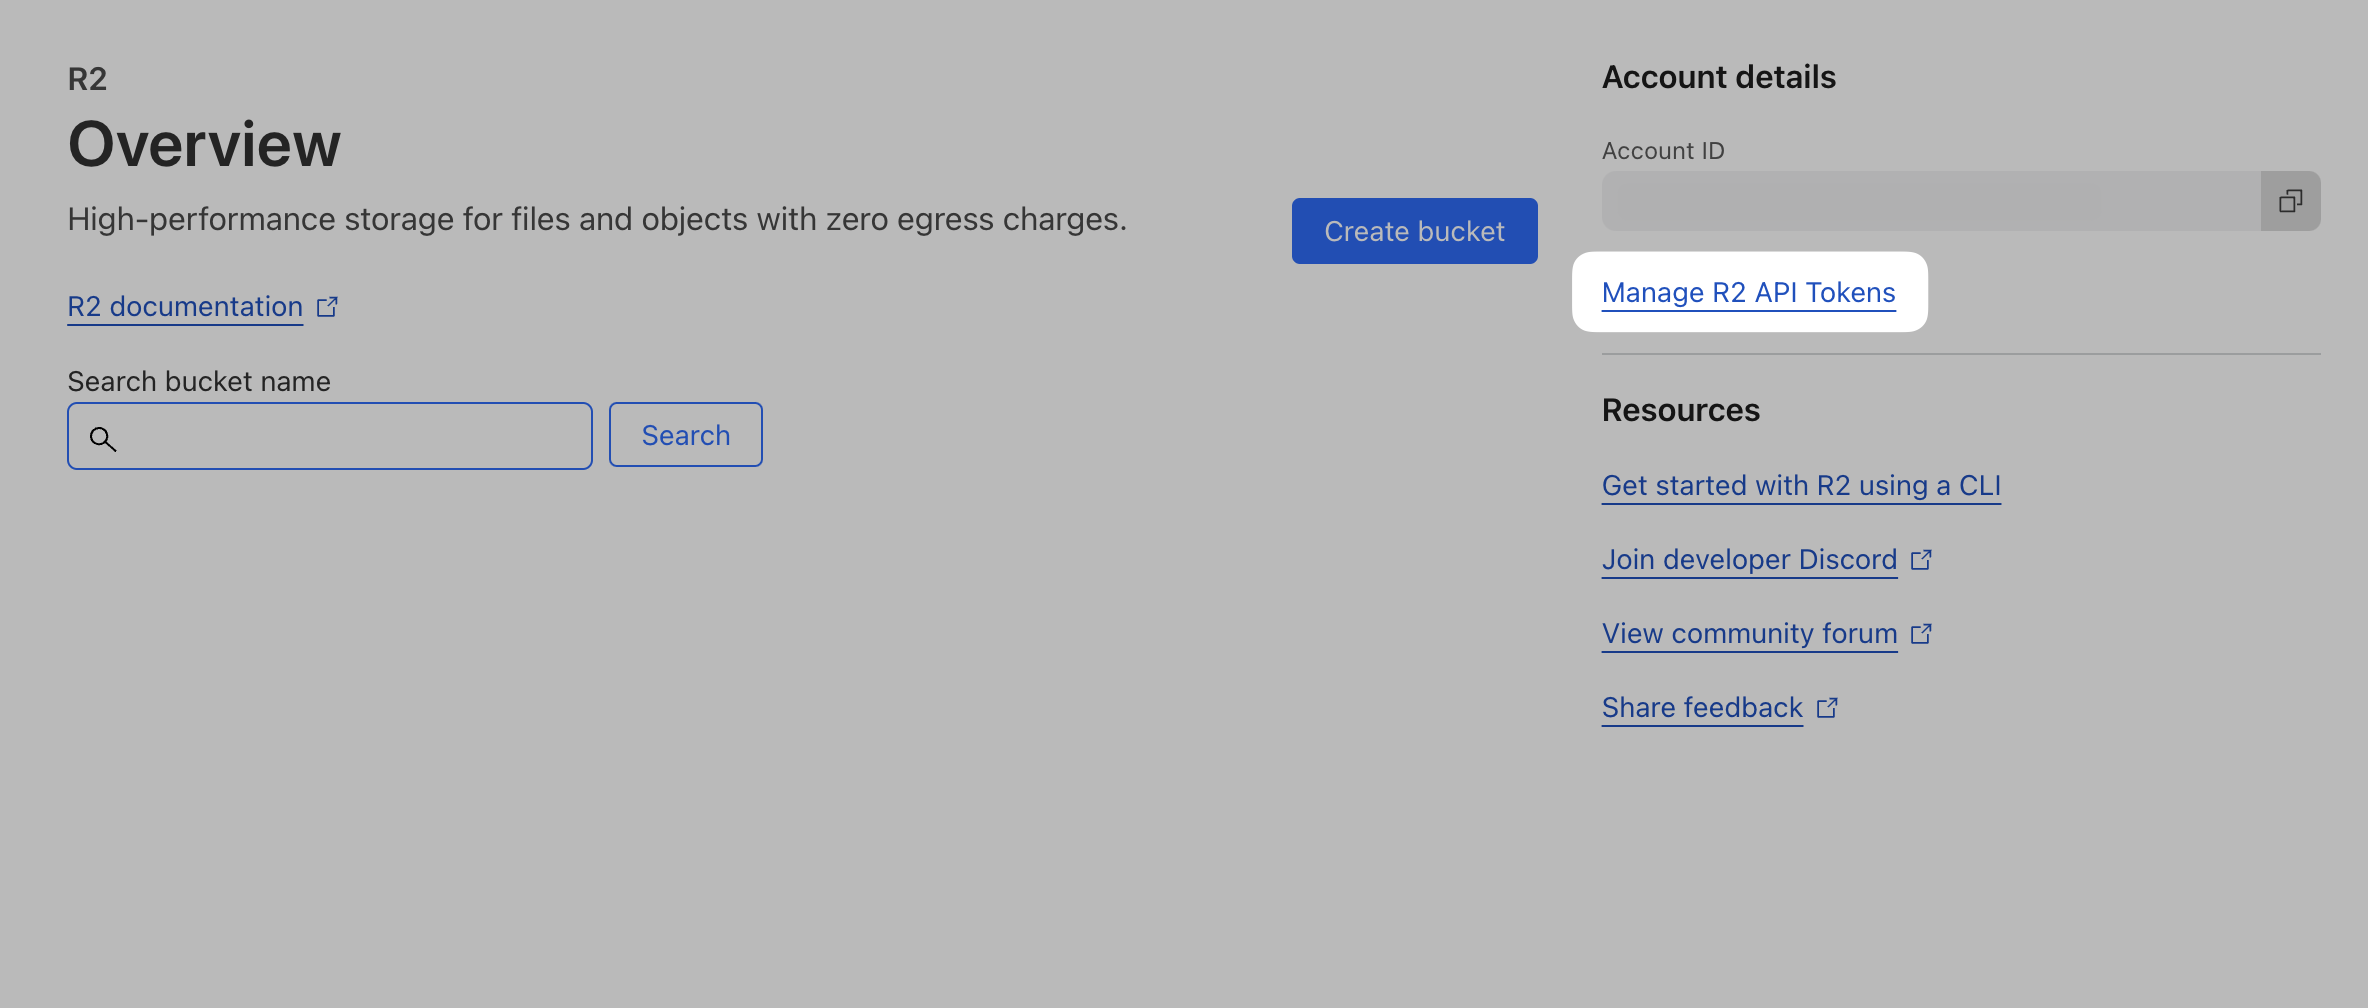
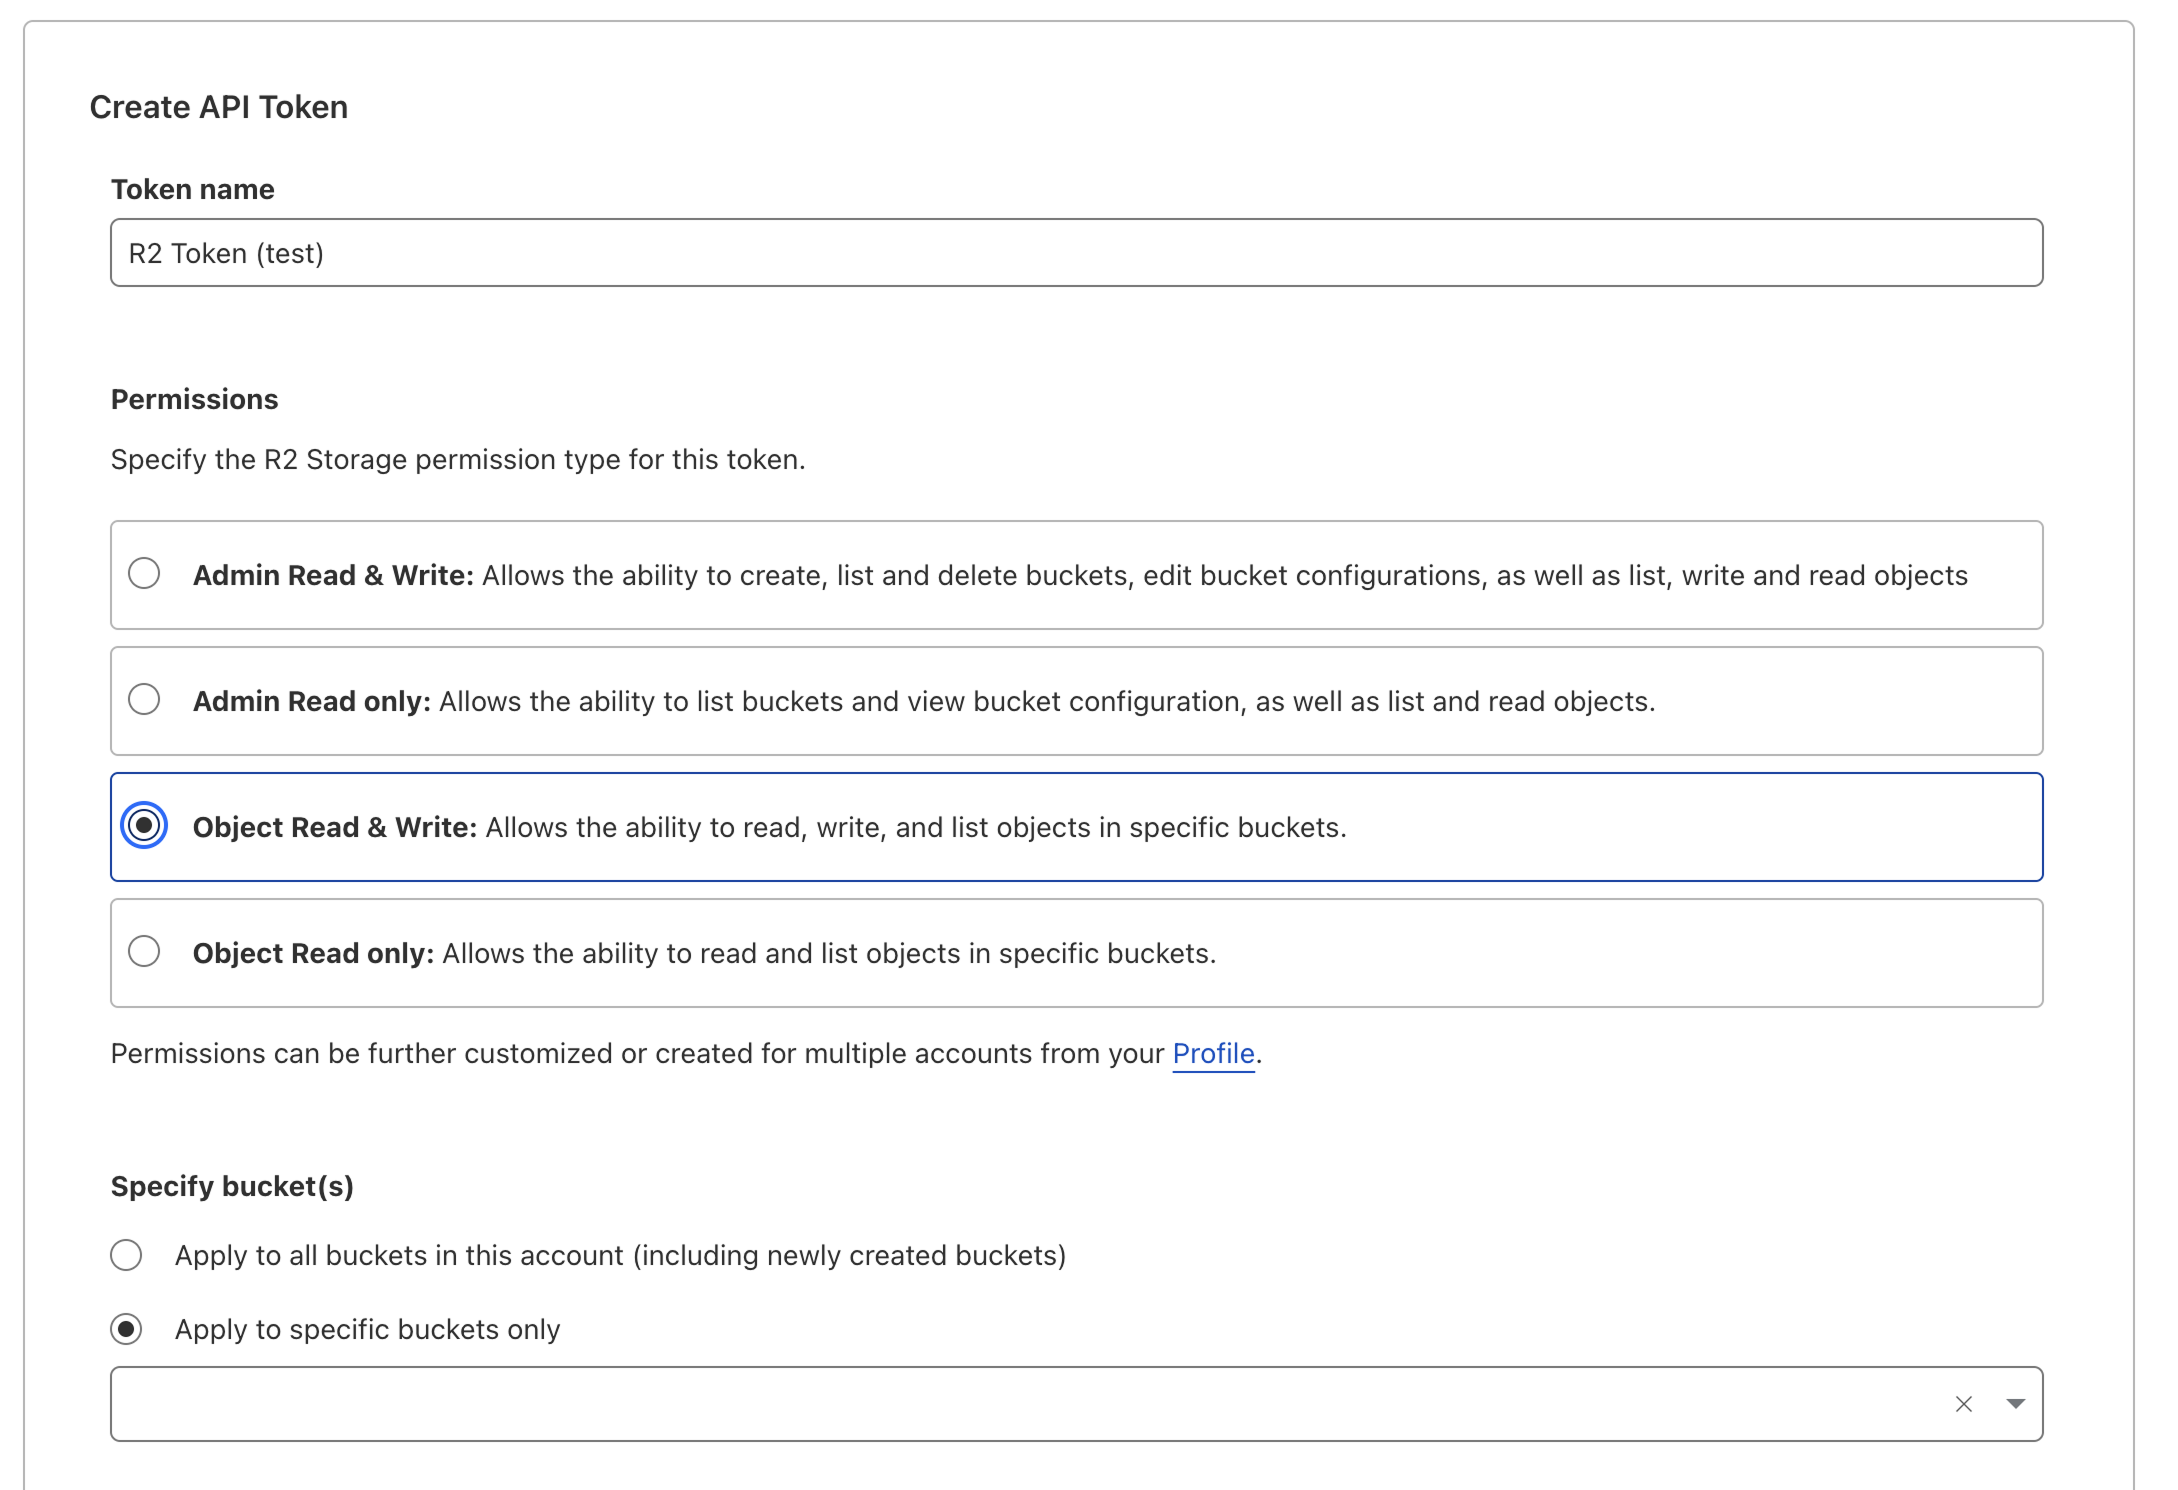
Access Key ID and Secret Access Key values – you’ll need them in the next step.
3

Set up R2 environment variables

Once you have your credentials, set them in your .env file:
.env
S3_ACCESS_KEY= // this is the Access Key ID value from Step 2
S3_SECRET_KEY= // this is the Secret Access Key value from Step 2
S3_ENDPOINT= // this is the S3 API value from Step 1
S3_BUCKET= // this is the name of the bucket you created in Step 1

Next Steps

Once you’ve completed the Cloudflare R2 setup, proceed to Step 9: Resend to set up email functionality (optional).